Create New Diologi Project
This page completes the Diologi app side of the quick integration flow after the gateway hardware is installed and the local gateway setup is prepared.
You will communicate through the Diologi app.
Open the Diologi app: web.diologi.com
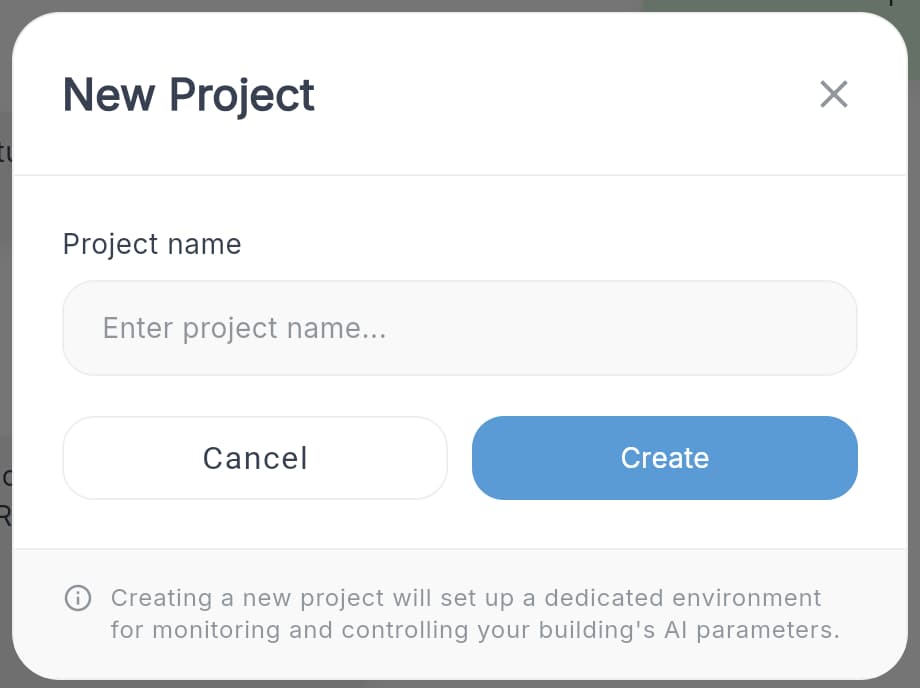
Create a New Project
A project usually represents one building.
It can include multiple field devices (controllers or supervisors) and can be shared with other Diologi app users.
In the left sidebar, click + New project, enter the project name, and click Create.
You need to be registered as an integrator first.
Add a New Device
A device represents a physical on-site device that connects to the Diologi app via MQTT.
For this quick integration flow, register the Diologi gateway itself as the device.
If your device uses another protocol (e.g. BACnet, Modbus), an MQTT gateway is required. For seamless integration, it is recommended to use the Set Up Diologi Gateway — available as free distributed software. The gateway itself is treated as a device by the Diologi app.
- Click the ⋮ menu next to the project name and select Project details to open Project Settings.
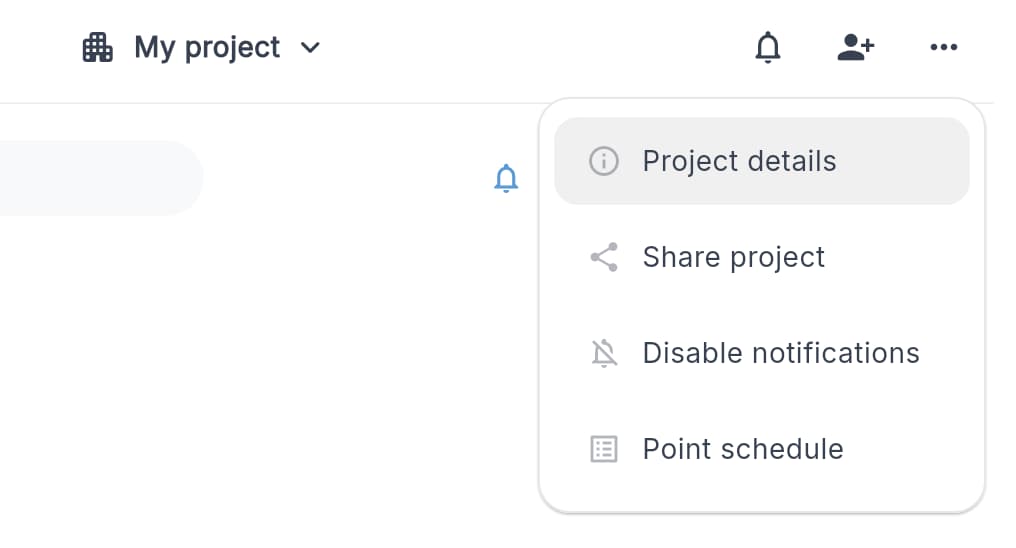
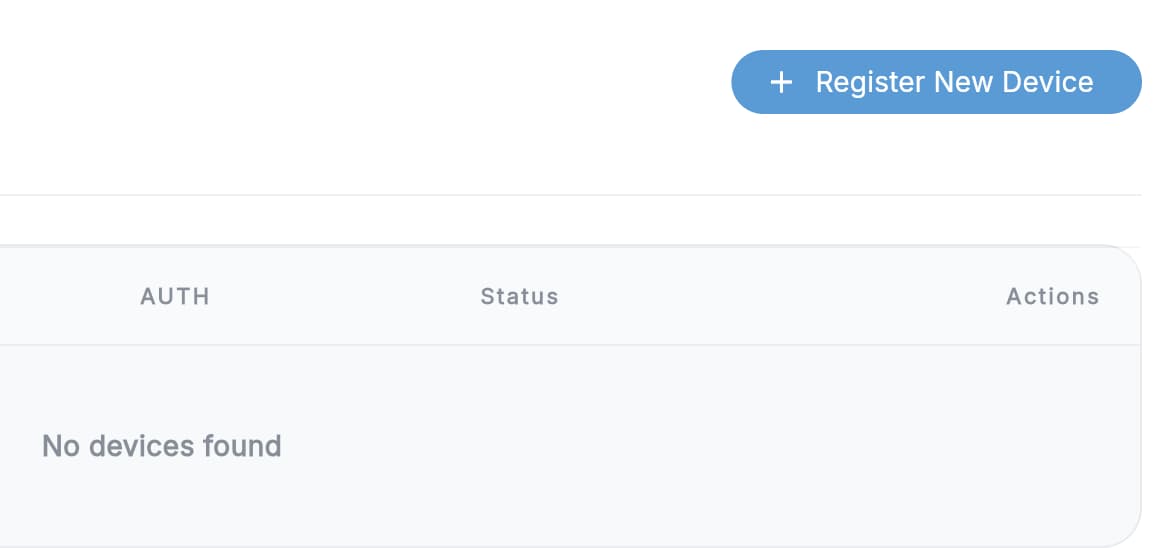
- Open the Devices tab and click + Register New Device. Enter a short, meaningful device name and confirm.
Connect Your Device
- In the device list, click the ⋮ menu on your device and select Issue certificates.
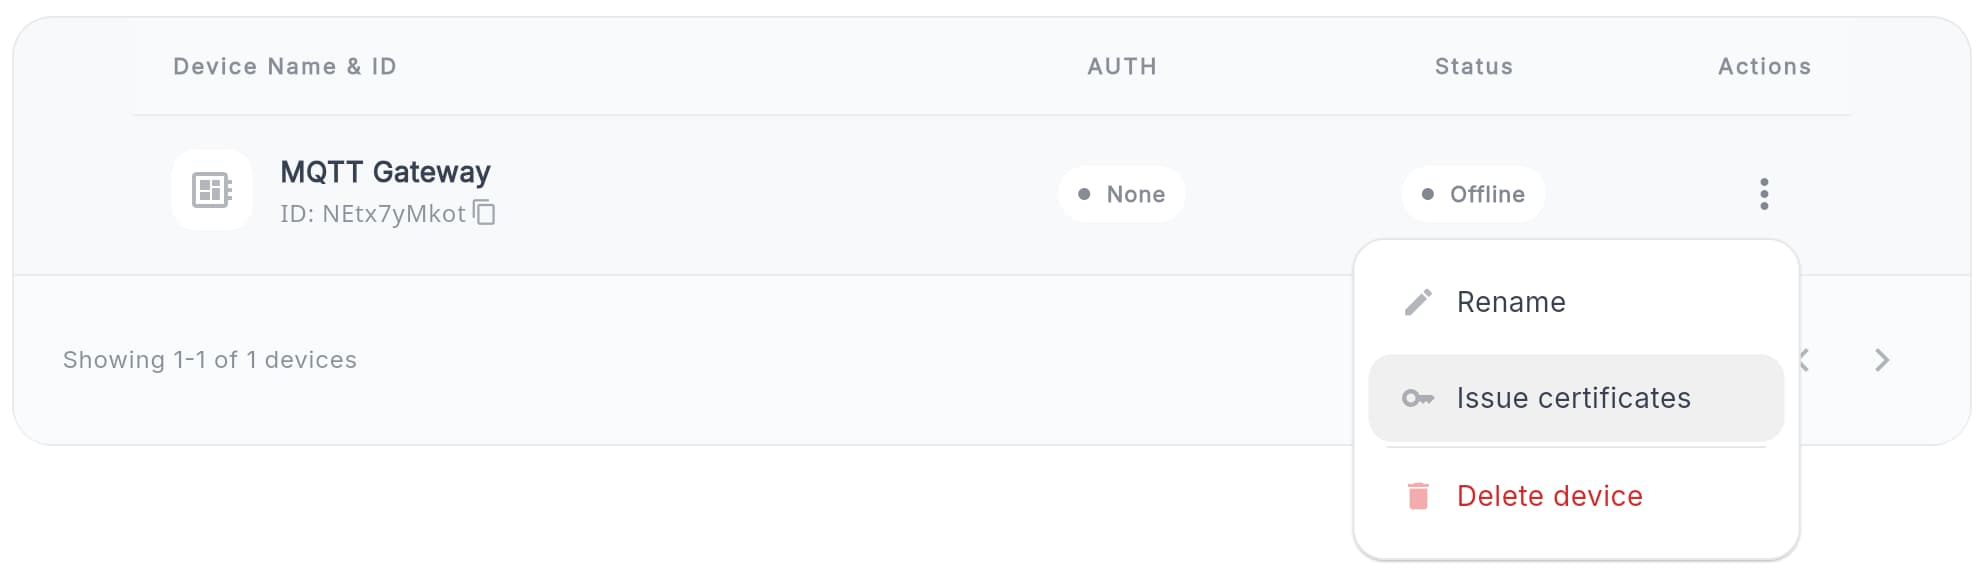
The Device ID is shown below the device name in the list. Save it — you will need it when configuring your MQTT client.
- Select the Certificate format:
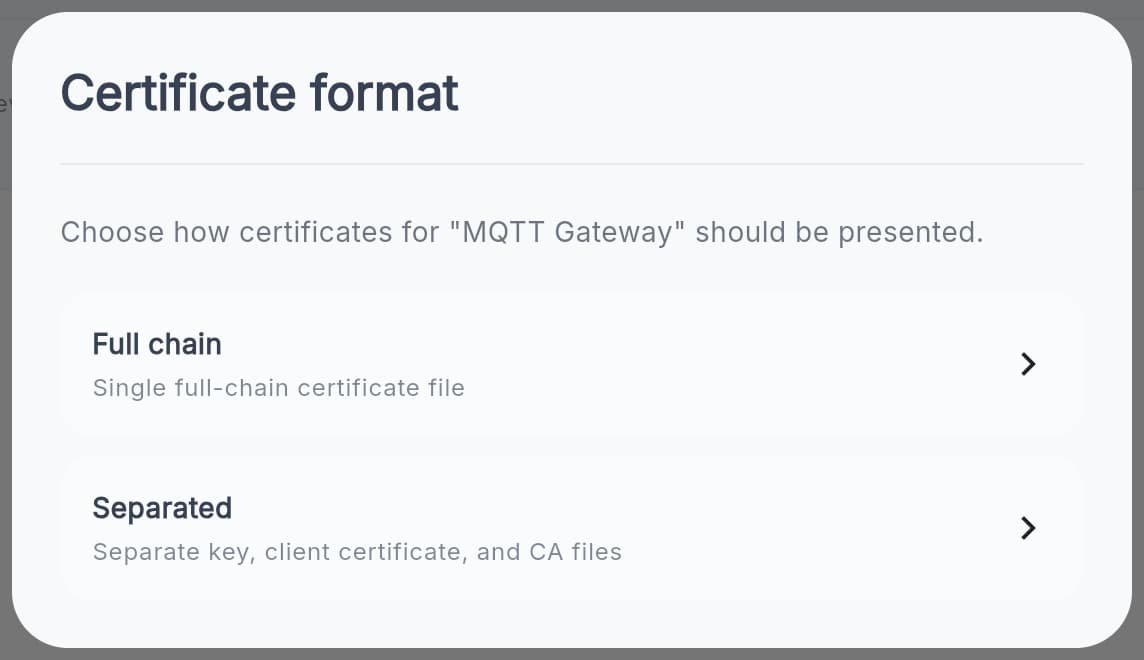
-
Separated — CA certificate, device certificate, and private key as separate files
(common for most devices) -
Full chain — Single file containing the CA certificate, device certificate, and private key
(common for Niagara and Niagara-based supervisors)noteOnly one active certificate per device is allowed.
If a certificate is lost, it must be revoked and reissued.
- MQTT Connection Settings
After downloading the certificates, return to the gateway MQTT settings and upload them there. For the Diologi gateway flow, continue with Step 6. Configure MQTT connection to Diologi on Set Up Diologi Gateway. For device-specific instructions on other MQTT clients, see the Connecting other Devices section.
-
MQTT host / Broker Endpoint:
mqtt.diologi.com -
Port:
8883 -
MQTT Client ID:
Your Device ID -
TLS:
Enabled -
MQTT version:
5.0tipThe Device ID is listed below the device name in Project Settings → Devices.
-
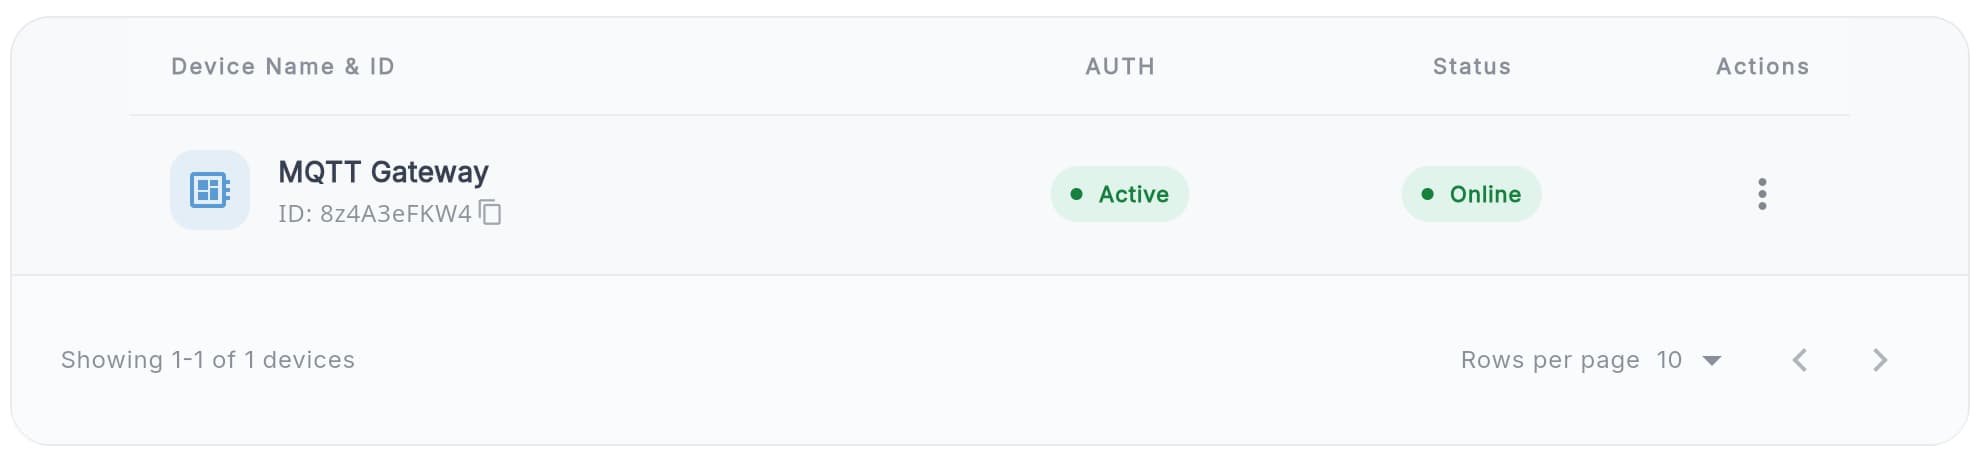
Verify Connection
Return to the Devices list.
If everything is configured correctly, the AUTH status will change to Active and Status to Online.
Set Up MQTT Communication
Once the device is connected, upload an Excel file with the project settings and MQTT point list.
- Go to ⋮ → Point schedule and click Export to download the current point schedule. You can use it as a template if you have just created the project.

- Open the downloaded Excel file and fill in the required fields

point_id
- Leave empty on first import - it will be generated automatically
- If removed later, the point will be recreated and history will be lost
- If kept, the point will be updated and history preserved
menu_structure
Defines project hierarchy and navigation in the Diologi app.
- Use
/as separator - Allowed characters: letters, digits, spaces, underscores
- Segment length: 3–30 characters
incoming_topic
MQTT subscription topic for messages coming into the Diologi app.
- Must start with the Device ID
- Use
/as separator - Must not start or end with
/ - Max length: 300 characters
- Allowed characters: letters, digits, underscores
outgoing_topic
MQTT publishing topic for messages sent from the Diologi app.
The same rules apply as for incoming_topic.
MQTT topics on your field device must exactly match the topics defined in the Excel file, including the device ID at the beginning.
point_mode
Defines how the Diologi app interacts with the point
Subscribe- the Diologi app only subscribes to the point to read values from the device.Publish- the Diologi app subscribes to the point and can also publish values back to the device. New values can be set via the Set value menu or using an AI command.
point_type
- Float - decimal numbers
- Boolean -
TRUE/FALSE - Integer - whole numbers
float_format
Defines the number of decimal places using the format .#, where # is the number of decimals.
For example, if the device sends 21.1234:
0→ displays 21 in the Diologi app.1→ displays 21.1.2→ displays 21.12- ...
float_publish_range
Limits writable float values.
Format: min, max
For example: 10.0, 75.5
selector_range
Maps numeric values to meaningful labels.
Examples:
- Boolean:
true: 'Alarm',false: 'No alarm' - Integer:
0: 'Off',1: 'On',2: 'Auto'
Limits:
- Description length: 1–30 characters
- Key value length: 1–6 digits
This is the minimum configuration required to get your project running. After completing the file, save and import it back via Project settings → Point schedule → Import.
Additionally, you can configure notifications, history logging, and AI-based interaction to communicate with the Diologi app using natural language.
Share a Project
To give other users access to your project, go to ⋮ → Project details → Users. Enter the user's email address, select their role, and click Invite user.

You can create custom roles with different access levels in the Roles section of Project Settings.
When a project is shared, the user receives a notification in the Diologi app. You can revoke access at any time from the same Users panel.
Each project must have at least one user with the Administrator role.
Notifications
To enable notifications, fill in the notification_on column in the project settings Excel file.
Trigger on specific values
- For boolean points use
TRUEorFALSE. - For integers use a comma-separated list of values, e.g.:
0, 1, 2
Trigger when outside a range (for floats)
- To limit only one side of the range, use a single condition, e.g.:
<=10.5 - To limit both sides, use two conditions separated by a comma:
<=10.5, >75.2
History
Enable history logging by filling the history column.
Supported formats:
##d - every ## days
##h - every ## hours
##m - every ## minutes
##s - every ## seconds
##ms - every ## milliseconds
AI interaction
When you communicate with the Diologi app using natural language, the AI engine relies on the following fields:
- menu_structure
- selector_range
- meta_info
The more accurately and uniquely these fields describe each point, the better the AI can map user requests to the project structure and implement required functions.
meta_info Use this field for additional context. There is no need to duplicate information already present in other fields. Typical use cases include:
- Location
(e.g. Room 301, Level 3, Block 2, Reception) - Adding technical details
(e.g. pressure switch is interlocked with primary ASHP pumps) - Grouping systems by common function when it’s not obvious from menu_structure
(e.g. HWS, ASHP secondary circuit)

Often, meta_info will contain the same information for multiple points, especially when used for location data. For example, temperature and humidity sensors in the same room, or multiple rooms served by the same AHU.
Maximum length: 500 characters
Auto status check
When sending a control command, you can ask the AI to verify whether the command was successful by defining a status feedback point. For example, check a fan DPS on the AHU start command.
To do this, add the following to the meta_info field of the control point:
StatusCheck: "point_name"

Rules:
- Status and control points must be in the same submenu
- Monitoring lasts 5 minutes after the command
- The result is determined based on point names and their selector_range, so make sure selector descriptions are clear and meaningful.
Start using the app
Once the project settings file is filled in and successfully imported, you can start using the app.
Use the menu to:
- Check system status and View live readings
- Change setpoints or switch equipment on/off
- Check actlive alerts
Ensure that values are updating correctly and that communication between the Diologi app and field devices is stable.
You can test AI functionality by asking, for example:
- Show project info
- Show plant info (e.g. Show me AHU1 info)
- Show the list of pre-set notifications
- Show active alarms
- Show temperature readings for AHU1
- Change a setpoint or switch a plant on/off
- Ask for the trend of historical point data
Although the Diologi app understands natural language, AI functionality is limited to supported intents. We continuously expand these capabilities and will notify you as new features become available.
At this point, the quick integration flow is complete. If you are integrating another MQTT client or supervisor instead of the Diologi gateway, continue with Connecting other Devices.